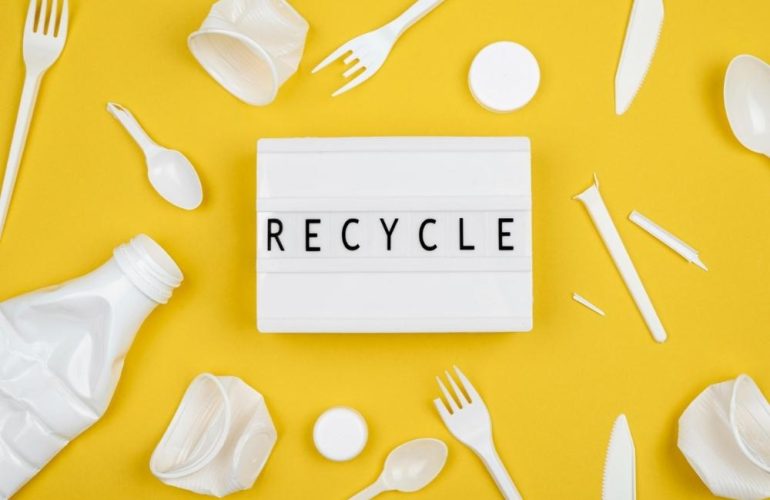
Banyaknya sampah yang menumpuk dan menggunung di TPA membuat kondisi sekitar semakin memburuk karena sampah tidak bisa diurai secara alami. Sampah plastik menjadi salah satu sampah yang sangat berbahaya untuk lingkungan karena bisa membutuhkan waktu yang cukup panjang supaya bisa terurai secara sempurna.
Dengan demikian, banyaknya sampah plastik sebaiknya dilakukan pengelolaan secara optimal supaya bisa dimanfaatkan menjadi barang lain yang lebih berguna. Diperkirakan dengan banyaknya jumlah sampah plastik akan terus mengalami peningkatan setiap hari yang sama banyaknya dengan ikan di lautan.
Pada kehidupan sehari-hari kehadiran dari sampah lebih dikenal dengan limbah. Limbah merupakan hasil dari buangan yang berasal dari proses industri, produksi hingga domestik rumah tangga.
Apabila penumpukan sampah dan limbah tidak dilakukan pengelolaan dengan benar tentunya bisa membuat bumi lebih tidak sehat karena bahan-bahan tersebut tidak bisa terurai secara alami. Sehingga setiap orang harus tergerak hatinya untuk membantu dalam mengurangi penumpukan sampah di bumi melalui proses daur ulang pada beberapa barang yang bisa dimanfaatkan kembali.
Teknik 3 R yang Bisa Diterapkan
1. Reduce
Reduce merupakan teknik yang bisa digunakan dalam mengurangi penggunaan beberapa barang yang bisa menimbulkan sampah dan tidak dapat dilakukan daur ulang. Pada penerapan teknik daur ulang yang satu ini menjadi cara yang sangat mudah dilakukan oleh setiap orang supaya jumlah sampah tidak semakin menumpuk setiap harinya yang menjadikan tidak ramah lingkungan.
Seperti halnya ketika sedang berbelanja dan membawa tas belanja dari rumah sehingga tidak perlu membeli tas plastik yang berasal dari toko. Selain itu, ketika sedang bepergian bisa dengan membawa botol minum sendiri tanpa harus membeli dan ini menjadi bentuk cara yang dapat dilakukan untuk mengurangi penumpukan sampah di lingkungan sekitar.
Dengan mengikuti cara-cara tersebut tentunya bisa membantu dalam mengurangi penumpukan jumlah sampah yang berakibat tidak baik bagi lingkungan sekitar dan kesehatan manusia nantinya. Terlebih untuk sampah-sampah yang tidak bisa terurai dengan baik tentunya hanya menjadi sampah yang terus menumpuk dan menjadikan pencemaran terhadap tanah dan lingkungan sekitar.
Sehingga dibutuhkan kreativitas tinggi oleh masyarakat sekitar dalam memanfaatkan sampah yang ada di lingkungannya supaya bisa menghasilkan produk baru dengan manfaat lainnya yang dapat digunakan secara maksimal. Pemberdayaan masyarakat lebih dibutuhkan dalam mengurangi jumlah sampah dengan cara tidak perlu membeli barang-barang yang bisa menimbulkan sampah tidak berguna lagi.
2. Reuse
Reuse merupakan DIY barang-barang recycle yang bisa dimanfaatkan kembali jika memang banyak tertumpuk di lingkungan sekitar untuk dijadikan barang yang memiliki nilai guna semaksimal mungkin. Dengan artian, bahwasanya barang-barang yang sebenarnya dianggap tidak memiliki nilai guna tersebut sebaiknya jangan langsung dibuang ke tempat sampah begitu saja karena dengan adanya kreativitas yang tinggi bisa mengubah fungsi dari sampah tersebut supaya lebih memiliki nilai guna kembali di mata masyarakat.
Seperti halnya ketika sedang berbelanja online biasanya untuk paket yang diterima akan dibungkus menggunakan kardus dan bubble wrap yang sebaiknya disimpan kembali supaya nanti bisa digunakan untuk kebutuhan lain. Selain itu, dapat melakukan pengurangan dalam penggunaan barang-barang yang bisa menimbulkan kerusakan dengan mudah ataupun barang yang hanya dapat digunakan sekali pakai saja dan memilih jenis barang yang lebih reusable.
Misalnya untuk membersihkan wajah dari make up ataupun debu yang biasanya memanfaatkan bahan dari kapas sekali pakai bisa memilih kapas yang dapat digunakan berulang kali atau yang dikenal dengan sebutan reusable cotton pads. Keunggulan dari penggunaan kapas tersebut lebih mudah dicuci dan digunakan kembali sehingga kecil kemungkinan terjadi penumpukan sampah yang ada di lingkungan sekitar.
Pada penerapan cara ini juga lebih menghemat pengeluaran karena tidak mengharuskan untuk membeli kapas secara terus-menerus. Cara ini bisa dilakukan untuk membantu dalam mengurangi penumpukan sampah di TPA dari bahan-bahan yang sulit terurai secara sempurna dan justru hanya menyebabkan pencemaran terhadap sampah dan memberikan dampak buruk terhadap kesehatan hingga lingkungan sekitar.
3. Recycle
Recycle atau daur ulang ini merupakan teknik yang bisa digunakan dalam proses pengolahan limbah untuk dijadikan sebagai barang baru yang mempunyai banyak manfaat dari fungsi utamanya. Seperti ketika memiliki banyak kain perca karena sedang menjalankan usaha jahit ataupun pengusaha konveksi tentunya dengan ketersediaan kain bekas yang banyak bisa dimanfaatkan untuk dialihkan fungsinya.
Kain perca biasanya berupa potongan yang berasal dari kain utuh dan dapat dijahit kembali untuk dijadikan sebagai gorden dengan menggunakan kreativitas dan skill yang dimiliki supaya barang yang sebelumnya tidak memiliki nilai guna lagi dapat dimanfaatkan kembali. Contoh lainnya yaitu plastik bungkus dari bekas makanan ataupun minuman juga bisa dikumpulkan untuk dijahit supaya bisa dijadikan sebagai taplak meja anti air.
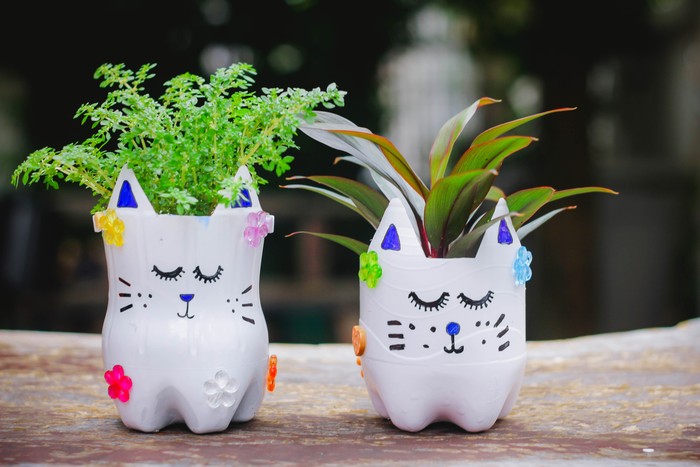
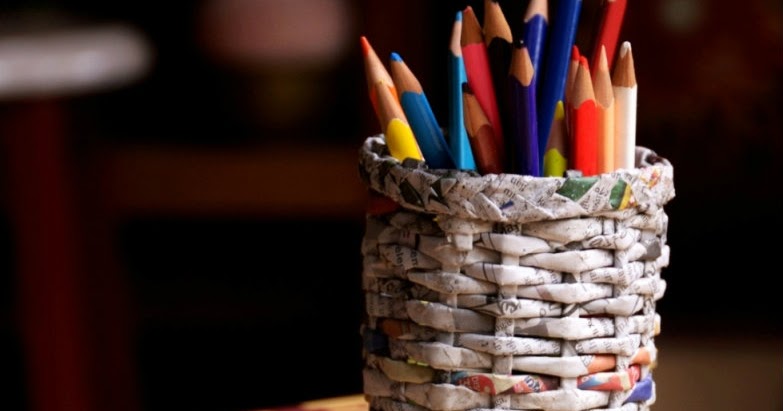
Selain itu, sekarang tentunya sudah banyak penumpukan sampah dari botol plastik bekas air mineral ataupun minuman lain yang berserakan dan bisa dipungut untuk dilakukan pengolahan daur ulang terlebih dahulu supaya bisa menjadi wadah alat tulis ataupun vas bunga yang cantik. Apabila memiliki kreativitas yang tinggi dalam mengubah barang-barang bekas untuk dijadikan barang bernilai guna tentunya akan memiliki nilai jual yang lebih tinggi di pasaran. Dan jika anda tertarik dengan proses daur ulang ini bisa mengecek di situs www.gatherspace.com yang memberikan info cara daur ulang yang aman.
Pada proses recycle ini harus memiliki kesadaran yang besar dari lingkungan sekitar supaya bisa membantu dalam mengenakan peningkatan jumlah sampah yang terus menumpuk di TPA. Apabila banyak sampah yang ada di lingkungan sekitar dan rasanya dapat dimanfaatkan kembali tentunya bisa mengalih fungsikan untuk dijadikan barang lain yang memiliki nilai jual dan bahkan ini menjadi peluang bisnis menjanjikan dengan modalnya yang tidak terlalu banyak guna menghasilkan produk baru.
Pragmatic Play adalah salah satu provider game slot populer yang memiliki banyak sekali kolekso game slot populer dengan hadiah dan RTP yang memuaskan. Game slot online adalah permainan judi yang dilakukan dengan cara memutar gulungan mesin slot sampai ada simbol pilihan atau simbol wild yang muncul. Bagi pemain yang tidak ingin pusing dan mau cepat menang bisa memilih game slot online yang memiliki permainan acak ini. Permainan slot dari Pragmatic play dan banyak provider game slot online lainnya dapat dimainkan dengan satu akun member situs judi slot gacor online resmi saja. Cukup satu kali daftar anggota baru saja bisa mendapatkan pilihan game slot lengkap dari provider yang memiliki ijin resmi Malta Gaming Authority. Sebagai salah satu permainan arcade yang populer, tidak begitu sulit untuk menemukan situs judi slot terpercaya dengan sistem keamanan dan layanan profesional yang selalu online hingga 24 jam nonstop. Jika bermain di situs judi online resmi, lebih banyak profit yang akan masuk ke saldo akun yang pemain miliki dari beragam bonus dan jackpot yang pasti akan dibayar.
Definisi dan Fitur Dalam Game Slot Online
Setiap provider game slot akan menyediakan permainan judi dengan tema-tema yang beragam dan inovarif seperti game Pragmatic play yang banyak merilis game slot dengan tema primer dan tema Asia tapi dasar permainan judi slot online selalu sama. Keunikan sari game slot adalah meskipun jenis permainan dan tema berbeda tapi dasar permainan tetap sama sehingga pemain tidak terlalu sulit untuk beradaptasi pada game slot yang berbeda. Mesin slot online dikenal sebagai permainan arcade yang populer dengan modal betting paling murah. Permainan mesin slot bisa dilakukan dengan memutar setiap gulungan atau reel pada mesin slot dengan tujuan untuk mendapatkan simbol pilihan yang ada dalam game slot. Setiap simbol yang ada di dalam game slot online punya nilai pembayaran berbeda karena itu jumlah jackpot yang akan diterima pemain mesin slot online menjadi variatif sesuai dengan simbol yang ada dalam gulungan mesin slot. Lama putaran di game slot Pragmatic play antara 10 detik sampai 30 detik saja. Game slot online juga memiliki beberapa simbol khusus sebagai berikut ini:
1. Simbol Wild merupakan simbol khusus dalam game slot dengan fungsi akan menggantikan semua simbol yang ada di dalam mesin slot kecuali simbol scatter. Melalui simbol wild, pemain slot bisa memenangkan jackpot utama yang ditawarkan oleh game slot populer.
2. Simbol Scatter juga simbol khusus dalam permainan slot. Memperoleh 3 simbol scatter saat main game slot online akan memberikan tambahan putaran gratis dalam jumlah tertentu. Melalui jumlah free spin yang bertambah, peluang menang pemain juga menjadi semakin besar.
Game slot dari Pragmatic play maupun dari provider lainnya selalu menghadirkan fitur dan bonus yang menguntungkan bagi membernya. Fitur dan bonus yang tentu menambah keuntungan bagi pemain slot online itu sendiri. Beberapa fitur dan bonus yang selalu ada di mesin slot gacor online adalah:
1. RTP atau Return to Player merupakan pengembalian yang akan dioberikan pada pemain slot. RTP diberikan dalam persentase. Rumus yang dipakai untuk menghitung RTP game slot mudah dimengerti oleh pemain. Misalnya, main game slot dengan RTP 95% pakai modal 2 juta akan memberikan RTP sebesar 2.000.000 X 95% = 1.800.000. Nilai RTP ini akan selalu berubah membuat pemain harus cek ke bocoran RTP live untuk mengetahui nilai RTP game slot.
2. Free Spin atau bonus putaran gratis merupakan bonus putaran dengan jumlah antara 10 hingga 50 kali putaran. Kemenangan yang didapatkan selama melakukan free spin dapat dicairkan. Sifat free spin yang ada dalam game slot adalah otomatis karena telah diatur oleh sistem computer dalam game slot online.
3. Demo Slot adalah fitur yang membantu pemain untuk mengenal karakter game slot online dan beradaptasi pada pola taruhan dan sensasi dari game slot online. Demo slot memberikan kesempatan memainkan game slot online tanpa modal. Kemenangan yang didapatkan ketika menggunakan demo slot tidak bisa dicairkan.
4. Paytable adalah halaman informasi yang ada dalam game slot. Pada halaman paytable game slot online, pemain akan mendapatkan detail tentang pilihan simbol dan nilai payment, range taruhan, jumlah baris pembayaran, persentase RTP dan banyak informasi lainnya yang berkaitan dengan game slot online.
Permainan slot yang punya permainan acak tidak akan membuat pemainnya pusing karena dengan memutar reel sudah bisa menang. Jenis permainan mesin slot online populer saat ini sudah bisa dimainkan dari semua jenis perangkat android dan ios yang membuat proses betting akan selalu efektif mau dilakukan kapan dan dimana saja.
Info Provider Game Slot Online Gacor Terpercaya
Pragmatic play bukan satu-satunya provider yang akan memberikan permainan judi slot yang populer bagi pemainnya. Ada lebih dari puluhan provider game slot online yang sudah terkenal dengan kinerja yang baik dan memiliki ijin resmi dari Malta Gaming Authority. Game slot yang sudah memperoleh ijin resmi dari MGA pasti aman karena dat asli dan saldo akun yang pemain miliki akan memperoleh perlindungan yang maksimal. Beberapa provider game slot online yang akan selalu memberikan game slot terpercaya untuk pemain slot adalah:
1. Pragmatic play merupakan provider game slot yang menguasai pasar game slot di berbagai Negara. Memainkan game slot dari Pragmatic Gaming akan selalu memberikan profit yang besar sebab modal deposit yang dibutuhkan lebih kecil tapi selalu menawarkan RTP dan hadiah menang yang besar pada membernya. Semua game slot dari provider Pragmatic play punya tema dan fitur yang inovatif.
2. Playstar Gaming adalah penyedia game slot online yang lebih unggul dari teknologi dan tema modern. Playstar yang focus dengan tema dan teknologi baru pada setiap game slot yang dirilis akan memberikan pengalaman betting yang lebih asyik dan hadiah menang yang besar.
3. Real Time Gaming atau RTP slot merupakan provider game slot gacor yang akan memberikan game yang berkualitas dan punya sensasi baru pada setiap game slot yang dirilis. RTP slot yang sudah berdiri sejak tahun 1994 tentu saja memiliki pengalaman yang sangat memadai untuk membuat game slot yang sempurna bagi pemain slot.
4. Spade Gaming adalah provider game slot yang menawarkan bonus sensasional dan RTP tinggi. Selalu melibatkan pihak yang profesional dan memiliki ijin resmi dari Malta Gaming membuat Spade Gaming menjadi provider game slot Asia paling bagus hingga saat ini.
5. Joker Gaming Merupakan provider game slot Asia dengan permainan mudah menang. Menawarkan RTP dan jackpot besar untuk permainan judi slot yang lebih mudah menang membuat Joker gaming menjadi sangat populer di kalangan pemain slot.
6. Provider Slot88 adalah salah satu provider ternama yang asli dari Indonesia. Main game slot dari provider ini tidak kalah seru dan menguntungkan dari provider slot online internasional lainnya. Selama puluhan tahun. Provider slot88 telah konsisten membuktikan kualitasnya.
7. Provider YGGDrasil adalah game slot yang akan selalu seru dan tidak akan membosankan bahkan saat dimainkan selama berkali-kali. Provider game slot ternama ini hanya akan merilis game slot dengan karakter permainan yang berbeda dan mobile friendly.
Kiat Jitu Menang Jackpot Besar Slot Online
Walau permainan slot Pragmatic play memiliki pola acak yang tidak bisa ditebak kapan menang dan kalah, tapi tidak berarti pemain harus melakukan taruhan tanpa persiapan sama sekali. Agar permainan judi slot yang dilakukan dapat berjalan dengan maksimal dan mencapai target kemenangan yang sudah dibuat sejak pertama kali main game Pragmatic play Gaming ada beberapa kiat yang harus dilakukan. Kiat atau trik bermain game slot Pragmatic play gaming ini bertujuan untuk meningkatkan peluang menang yang didapatkan pemain saat main game slot online. Ini adalah pilihan kita sukses main game slot Pragmatic play gaming:
1. Mengerti karakter dari game slot yang dimainkan. Jika yang dimainkan adalah game slot multi payline maka pola bertaruh diangka maksimal memberikan peluang menang tinggi. Berbeda dengan game slot 3 gulungan yang lebih sederhana dan cepat menang karena tidak banyak simbol yang ada dalam game slot gacor. Pemain yang ingin main game slot harus lebih dulu mengerti karakter game slot dan pola taruhan apa yang paling tepat untuk dipakai.
2. Bermain dengan uang hiburan. Game slot sendiri pada dasarnya merupakan hiburan yang seru jadi bermain dengan uang yang khusus untuk berlibur keputusan yang tepat. Uang untuk hiburan lebih bisa pemain relakan untuk main game slot online dan nantinya selama main game slot online juga bisa berjalan tanpa beban. Tidak ada masalah yang akan muncul bila modal yang dipakai pemain rugi atau tidak kembali modal.
3. Jangan buru-buru. Selalu mainkan game slot saat kalian memiliki waktu luang sehingga proses bermain game slot online bisa dilakukan dengan santai dan tidak dalam keadaan emosi. Bermain dengan tenang dan tidak buru-buru sangat efektif untuk menjaga focus pemain pada permainan slot yang dilakukan.
4. Gunakan trik 1% untuk satu game slot. Cara ini adalah dengan membagi modal kalian dengan jumlah 1% dari semua modal maksimal untuk main satu game slot. Permainan slot akan memberikan peluang menang yang besar hanya pada saat pemain tidak terikat paa satu game slot saja.
5. Coba game slot baru atau game slot yang tidak populer. Cara lain yang akan membuat pemain tidak akan rugi karena sering kalah main game slot adalah dengan memilih game slot yang jarang dimainkan atau tidak ragu untuk mencoba game slot baru. Selain akan memberikan suasana yang fresh, game slot baru memiliki peluang menang yang lebih tinggi.
4 Pilihan Game Slot Jackpot Besar Uang Asli
Saat bermain judi slot online Pragmatic play atau game slot dari provider lainnya, kalian harus memilih game slot uang asli dengan jackpot besar yang sistem klaim tidak terlalu sulit dilakukan. Beberapa game slot terbaik yang akan memberikan jackpot besar yang mudah dicairkan ketika kalian main dengan bet uang asli adalah sebagai berikut ini:
1. Sweet Bonanza adalah permainan slot yang resmi dirilis oleh Pragmatic play Gaming. Tema game slot ini adalah Dunia permen dengan simbol permen serta makanan lezat. Main game slot ini lebih mudah menang karena memiliki formasi 12 payline dan RTP 96%. Jackpot utama game slot dari Pragmatic play hingga 21.175 kali total taruhan.
2. Madame Destiny. Permainan judi slot dari Pragmatic play ini memiliki tema peramal dan suasana yuang misterius. Game slot dengan 10 payline ini punya RTP 95% yang mudah menang. Madame sudah menunggu untuk melihat masa depan kalian. Game slot ini punya jackpot menang 3000 kali lipat taruhan.
3. Koi Gate adalah permainan judi slot terbaik dan populer dari Habanero gaming yang memberikan tema ikan koi serta bonus besar di setiap putaran yang terjadi di gerbang ikan kio. Mainkan game slot dengan 3000 cara menang dan RTP 98% ini untuk menang jackpot utama 8640 kali taruhan.
4. Mahjong Ways adalah permainan mesin slot gacor yang akan membuat pemainnya merasakan pengalaman bermain catur tradisional China yaitu Mahjong. Ada rtp 97% dalam game slot ini dan hadiah menang 3000 kali lipat jumlah taruhan.
Panduan Lengkap Main Di Situs Slot Resmi
Pragmatic play dan game slot populer dari provider lainnya bisa kalian mainkan dengan satu akun member saja. Proses berjudi game Pragmatic play selalu fairplay dan bebas akun bot yang membuat pemain bisa merasakan peluang menang sama besar dan adil. Beberapa langkah bermain game slot gacor yang fairplay di situs judi online terbaik adalah:
Pertama, buat akun baru karena ID dan kata sandi dibutuhkan untuk melakukan login kapan saha ke website situs judi slot yang terbaik. Buka halaman website situs judi yang baik lalu lengkapi formulir daftar berikut ini:
1. ID/ Nama Akun Member :
2. Password/ Kata sandi Akun :
3. Konfirmasi Password :
4. Nama Lengkap Member :
5. Alamat Email :
6. Nomor Telepon/ Whatsapp :
7. Nama Bank Lokal :
8. Nama Rekening Bank :
9. Nomor Rekening Bank :
10. Kode Validasi :
Kedua, melakukan setoran dana sesuai dengan modal taruhan yang mau dilakukan. Situs judi slot yang baik akan menyediakan metode pembayaran dengan memakai rekening Bank, pulsa atau aplikasi e-wallet. Buka menmu deposit lalu pilih akun bandar online dan masukkan jumlah setoran yang akan dilakukanm. Simpan formulir dan langsung lakukan pembayaran. Bandar judi slot hanya akan membutuhkan beberapa menit untuk memproses deposit yang pemkain lakukan.
Ketiga, login dengan menggunakan akun member di bandar judi slot terbaik. Tekan fitur Slot dan pilih provider Pragmatic play. Klik salah satu pilihan game slot dari Pragmatic play yang mucul. Pasang taruhan dan lakukan spin gulungan mesin slot sampai menang. Jackpot berapapun pasti akan dibayar dan pemain bisa melakukan penarikan kapan saja.
FAQ Tentang Game Slot Gacor
1. Apa saja Provider Game Slot Online Paling Gacor?
Pragmatic Play
Habanero
Joker Gaming
Top Trend Gaming
Playtech
Spade Gaming
PG Soft
2. Bagaimana cara bermain game slot di situs judi slot terbaik?
Lakukan pendaftaran dan deposit online. Pilih game slot yang akan dimainkan dan lakukan betting sebagai syarat memutar reel yang ada pada game slot.
3. Apakah perlu wakru yang lama untuk main game slot online:
Tidak perlu, game slot online hanya perlu 10 hingga 30 detik saja untuk satu kali putaran
4. Apa saja fitur yang ada dalam game slot online?
RTP live
Free Spin
Demo Slot
Paytable
Simbol Wild
Simbol Scatter
Mesin slot dengan mesin virtual, umum di situs atau agen judi pemenang, terus menjadi permainan favorit para penjudi di Indonesia. Selain itu, slot online sering digunakan oleh para penjudi untuk mencari penghasilan tambahan. Banyaknya tawaran untuk mendaftar keanggotaan di situs selain kota yang menawarkan bonus menarik seringkali membuat calon member ragu-ragu. Namun jangan sampai salah dalam memilih, karena hanya agen slot online terpercaya yang bisa memberikan segala kemudahan dalam hal pelayanan terbaik untuk membernya.
Situs kami adalah situs judi utama dan telah menjadi tempat yang nyaman dan mudah bagi ribuan pemain judi untuk memasang taruhan mereka. Ini karena mesin slot dikenal karena kesederhanaan permainannya dan kemenangan yang mudah. Belum lagi dengan adanya berbagai promosi yang selalu ditawarkan dalam bentuk bonus dan tentunya bernilai cukup besar. Selain itu, memenangkan bonus jackpot tentu saja akan meningkatkan jumlah hadiah yang Anda terima.
Bahkan, jika Anda hanya memiliki modal deposit minimum, Anda bisa mendapatkan peluang bonus yang sangat besar hingga mencapai ratusan juta rupiah. Tentu saja, dengan kumpulan hadiah yang begitu besar, tidak semua agen berhak untuk menang. Hanya agen mesin slot situs kami dengan lisensi resmi dan operasional yang dapat membayar bonus dalam ukuran berapa pun.
Lisensi ini adalah jaminan bahwa pemain pasti akan dibayar ketika mereka berpartisipasi dan menang. Demikian juga keamanan data pribadi dan transaksi deposit/withdraw selalu terenkripsi. Jadi pemain mesin slot dapat memasang taruhan mereka dengan nyaman dan tenang. Jangan khawatir. Jika terjadi masalah, Anda dapat langsung menghubungi tim layanan kami yang selalu online selama 24 jam nonstop. Jika Anda memiliki pertanyaan tentang perjudian online, kami akan menjawabnya dengan solusi terbaik.
7 Rekomendasi Provider Situs Judi Slot Online Paling Populer Terbaru
Syarat terakhir saat ini adalah mesin slot biasanya dimainkan secara online dengan tampilan yang mobile friendly. Hal ini tentunya dapat menarik perhatian para pemain khususnya pada situs judi. Dari hiburan sederhana hingga taruhan reguler di situs judi top seperti Situs kami. Situs slot online kami tidak sembarangan dalam menawarkan mesin slot.
Hal ini dibuktikan dengan tersedianya rekomendasi berbagai jenis mesin slot dari berbagai provider ternama dunia. Karena ada begitu banyak jenis mesin slot yang tersedia, mesin slot terbaik datang dari vendor dengan kualitas terbaik. Setiap penyedia memiliki kelebihan tersendiri yang pasti akan membawa kegembiraan bagi pemain saat bermain slot. Saat ini terdapat 7 provider mesin slot Gacor terpercaya dan terpercaya di Indonesia untuk berbagai jenis mesin slot yang baru saja diluncurkan. Simak daftar 7 rekomendasi mesin slot terbaik kami di Indonesia, antara lain:
Pragmatic Play
Ini adalah salah satu provider paling populer dari peluang online terbaik dengan jackpot terbanyak. Pragmatic Play tidak hanya menampilkan berbagai macam mesin slot dengan grafis yang menarik dan interaktif, tetapi juga membuat Anda tetap up to date dengan update terbaru. Juga, sebagian besar mesin slot virtual menggunakan peluang RTP tertinggi. Dibandingkan dengan perusahaan lain, rasio tertinggi bahkan bisa dikatakan di atas 95%. Mesin slot yang sering dimainkan termasuk Zeus Gate of Olympus, Aztec Gems, Wild Wild West, Sweet Bonanza, dan Dragon 888.
Selain itu, berbagai game dari Pragmatic Play dapat dimainkan kapan saja, di mana saja melalui browser ponsel Android dan iOS. Pada dasarnya, pemain yang memainkan slot Pragmatic Play pasti akan memiliki pengalaman yang berbeda dan membuat ketagihan.
Slot Playtech
Didirikan pada tahun 1999, perusahaan Playtech merilis berbagai hal baru dan pembaruan terbaru untuk mesin slot. Tentu saja, Playtech Slots selalu membuat daftar mesin slot terbaik. Salah satu fitur terbaru dari mesin slot Playtech adalah pemain dapat menambahkan taruhan di tengah putaran yang berputar. Tak perlu dikatakan, pembaruan animasi yang ditampilkan sangat menarik dan menarik.
Juga, mesin slot yang dirilis oleh Playtech sering kali datang dengan jackpot. Tentu saja, GameObjects dapat dengan mudah dimainkan melalui PC atau gadget. Jadi tidak ada salahnya jika Playtech menjadi salah satu provider mesin slot terbaik.
Joker123 Slot
Kehadiran provider ini identik dengan slot online dan game mancing terbesar di Asia. Dengan memberikan peluang menang sederhana, joker123 menggunakan platform canggih untuk memungkinkan akses seluas mungkin. Hebatnya Joker123 atau Joker Gaming adalah mereka selalu memberikan keamanan terupdate dan informasi transaksi yang lancar untuk setiap game judi online yang mereka tawarkan. Tidak perlu khawatir lagi, karena Anda dapat bermain langsung di PC Windows, Apple Macbook, dan smartphone Anda. Ini juga memudahkan anggota untuk mengisi saldo mereka menggunakan tautan alternatif. Salah satunya adalah penyediaan metode deposit melalui antar bank.
Habanero
Habanero merupakan provider terbesar dan terpopuler di kalangan pecinta judi mesin slot. Penyedia game ini dikenal membuat game slot online yang menawarkan jackpot besar untuk taruhan kecil. Tingkat kemenangan RTP yang sangat tinggi hingga mencapai 97%.
Sebuah terobosan dalam perjudian online, Habanero memberikan perhatian khusus pada mesin slot dengan permainan yang mudah dimenangkan. Mesin slot juga dilengkapi dengan software yang kompleks namun sangat ringan tanpa perlu internet cepat. Habanero berkomitmen untuk menyediakan mesin slot dengan kualitas terbaik dan hanya bekerja dengan agen judi tepercaya dan mematuhi standar internasional.
Semua game yang dibuat oleh Provider Habanero mengusung tema genre Bamboo Curtain atau Porcelain Country. Selain itu, mesin slot online Habanero tersedia dalam beberapa bahasa, termasuk Thailand, Jepang, Indonesia dan Vietnam. Keuntungan lain dari slot online Habanero adalah mendukung tampilan potret atau lanskap. Tentu saja, jangan lupa bocoran mesin slot yang paling gacor yakni: Zeus, London Hunter, Dragon Throne, Queen, Pretol, Juggernaut, dan banyak lagi.
Microgaming
Didirikan pada tahun 1994 sebagai salah satu provider slot judi online tertua, tidak heran Microgaming diakui sebagai provider slot berlisensi resmi utama. Karena Microgaming terbukti mampu menawarkan jaminan keamanan yang lebih dari kompetitornya. Penyedia mesin slot ini rutin merilis produk mesin slot terbaru setiap bulannya dan tentunya mendukung mobile dan web browser.
Prioritas utama Microgaming adalah menyediakan permainan slot berkualitas tinggi untuk semua pemain. Salah satunya adalah penyediaan layanan mesin slot multibahasa. Dalam hal promosi dan bonus, Microgaming adalah salah satu yang paling menarik. Hal ini dibuktikan dengan seringnya mengadakan promo dengan banyak item bonus.
Flow Gaming
Meski tergolong pemasok mesin slot modern, namun tidak pernah bisa dianggap remeh dibandingkan kompetitor lainnya. Karena Flow Gaming sudah terbukti bisa membuat link ke slot online yang fokus pada kenyamanan pemain. Persentase kemenangan RTP yang cukup tinggi selalu menarik semua slot online buatan Flow Gaming.
Secara khusus, provider Flow Gaming fokus pada jackpot, bonus, dan pengalaman bermain game terbaik untuk semua pengguna. Anda bisa membuktikannya dengan memberikan kesempatan kepada member untuk menang besar dengan mudah dengan bermain slot dari Flow Gaming. Faktanya, Flow Gaming selalu serius dan terus berinovasi untuk mengembangkan mesin slot yang mendukung multi-platform.
Spadegaming
Diperkenalkan Pertama kali pada tahun 2008, Spadegaming telah merilis ratusan game judi online yang menampilkan jackpot progresif senilai ratusan juta rupiah. Spadegaming dijuluki sebagai penyedia mesin slot yang mudah dimenangkan dengan mesin slot online dengan peluang RTP tertinggi. Provider spadegaming juga menawarkan kategori permainan yang dapat dibagi menjadi beberapa kategori.
Selain itu, Spadegaming sudah mendukung metode pembayaran terlengkap dan sangat cepat. Semua data selalu dienkripsi menggunakan teknologi terbaru. Jadi, gamer tidak perlu lagi khawatir membocorkan data pribadinya ke pihak ketiga, karena privasi data ada di tangan pemain itu sendiri.
Permainan Game Judi Slot Online Gacor Terbaru 2022
Dengan maraknya kemunculan berbagai provider yang menawarkan permainan di situs slot online kami, tentunya mereka menawarkan slot online terbaik untuk bertaruh pada permainan chaotic. Berikut beberapa game slot gacor masa kini :
Aztec Gems
Slot Aztec Gems di Pragmatic Play adalah pengalaman mendalam dari perburuan harta karun Aztec. Karena slot online ini memiliki tingkat kemenangan RTP sebesar 97,5%, banyak YouTuber yang menggunakannya sebagai konten dan bocoran untuk bermain slot online.
Sweet Bonanza
Slot gacor kedua ini juga dimiliki oleh provider Pragmatic Play bernama Sweet Bonanza. RTP mencapai 97,2% di slot online ini sangat sulit untuk dilewatkan.
Wild West Gold
Pragmatic Play adalah hub untuk slot RTP tinggi dan ada permainan slot bernama Wild West Gold dengan nuansa era koboi dengan RTP yang sangat tinggi hingga mencapai 96,5%.
Joker Jewels 888
Nah, inilah salah satu mesin slot paling gacor di Indonesia dan memiliki RTP yang sangat tinggi hingga mencapai 96%, jadi Anda tidak akan kesulitan untuk dapat memenangkan jackpotnya.
Minimal Deposit
25.000 IDR
Metode Deposit
Transfer Bank, Gopay, OVO
Slot Gacor
Sweet Bonanza, Gate of Olympus, Koi Gate, Aztec Gems
Provider Slot Tergacor
Pragmatic Play, Slot88 dan Microgaming
Keuntungan Bermain Slot di Agen Judi Online 24 jam Terpercaya
Sebagai member dari agen judi online terbaik dan terpercaya, Anda mendapatkan semua keuntungan dari pendaftaran pertama Anda. Yang terbaik dari semuanya, mudah untuk memainkan slot online, setoran murah, dan taruhan kecil. Selain itu, ada berbagai metode deposit untuk memudahkan anggota bermain kapan saja. Anda juga dapat dengan mudah mentransfer dana melalui bank yang tersedia selama 24 jam non-stop.
FAQ – Pertanyaan Seputar Situs Slot Online
Apa itu mesin slot online?
Laporan dari berbagai sumber terpercaya, seperti Wikipedia, Google, dan artikel terkait mesin slot online, menunjukkan perkembangan mesin slot di San Francisco pada tahun 1899 oleh seorang pria bernama Charles August Fey. Mesin slot pada awalnya dibuat dalam bentuk yang sangat sederhana dengan menggunakan simbol 1 tuas dan 3 gulungan (garis) yang berputar saat tuas ditekan. Saat itu permainan mesin slot pertama yang dulunya dimainkan dengan koin dan memberikan hadiah berupa harga pasaran, namun karena banyaknya permintaan dari pemain yang menginginkan uang tunai, maka sistem mesin slot diperbarui dan keuntungan berupa uang tunai.
Mesin slot adalah hal yang umum di kasino utama, tetapi dengan kemajuan teknologi, bandar judi slot online melihat ini sebagai peluang besar. Mesin slot online yang terhubung ke internet dibuat oleh pengembang permainan judi kasino dan saat ini terdapat puluhan ribu mesin slot online terbaik dengan jutaan pemain aktif. Fitur-fitur yang ditawarkan oleh provider situs slot online juga selalu up to date.
Kini, dengan bermain slot online, Anda tidak perlu lagi menguras dompet khusus tempat tinggal Anda untuk mengunjungi kasino luar negeri. Jika Anda memiliki akun slot online di ponsel, tablet, atau laptop Anda, Anda dapat langsung mulai bermain. Akun-akun tersebut bisa didapatkan secara gratis dari agen judi online terpercaya yang marak saat ini.
Mengapa game slot online begitu populer?
Setelah munculnya versi online, mesin slot online langsung mendapatkan popularitas dan menjadi alternatif yang tepat untuk menghasilkan pendapatan tambahan atau hanya untuk mengisi waktu luang Anda. Tidak diperlukan keahlian khusus untuk bermain mesin slot online. Yang harus Anda lakukan adalah memutuskan ukuran taruhan Anda dan menekan tombol putar untuk memutar gulungan dengan simbol. Ketika simbol berhenti berputar, hasil akhir ditentukan apakah Anda telah menghasilkan uang di slot online atau tidak. Secara umum, untuk memenangkan jackpot dalam permainan slot online, Anda memerlukan setidaknya dua simbol untuk memenuhi aturan payline.
Popularitas slot online semakin populer dengan munculnya fitur mesin slot yang lebih baru seperti slot gacor, jackpot progresif di slot online, dan putaran gratis untuk membeli slot online untuk kemenangan besar. Banyak bandar taruhan tepercaya menawarkan setoran yang sangat terjangkau dan murah untuk dimainkan semua orang. Penawaran jackpot besar slot online yang ditawarkan bisa mencapai puluhan juta rupiah dengan modal yang sangat minim dan irit.
Tahun ini mungkin akan menjadi puncak ketenaran untuk situs resmi slot online. Karena pandemi covid19 yang berkepanjangan telah memaksa orang untuk banyak bekerja dan belajar dari rumah, sehingga mereka mencari kegiatan lain yang bisa menghasilkan uang nyata dalam jangka pendek.
Bagaimana cara mencari bocoran slot online yang sedang gacor dan mudah menang?
Bagi para pemain judi online tentunya informasi mengenai bocoran mesin slot online yang gacor dan mudah dimenangkan sangatlah penting. Sangat sulit dan sederhana untuk mendapatkan saran tentang cara memutuskan slot online mana yang terbaik. Syarat utamanya adalah anda memiliki akun mesin slot melalui agen judi slot online terpercaya seperti situs kami.
Masuk ke situs web resmi utama menggunakan nama pengguna yang Anda daftarkan sebelumnya. Di bagian bawah banner terdapat informasi mengenai bocoran slot online ang sedang gacor. Tugas Anda adalah dengan cepat mengawasi game online mana yang mendapatkan jackpot besar. Semua mesin slot online menggunakan pengaturan waktu, jadi ketepatan waktu dan hoki adalah syarat utama untuk memenangkan slot online dengan mudah.
Ide Kerajinan DIY Barang-Barang Recycle Saat Bosan – Jika merasa sangat bosan ataupun bingung untuk melakukan kegiatan apa tentunya dapat menghasilkan kerajinan dari penggunaan barang bekas yang dijadikan sebagai solusi paling tepat. Selain bisa memanfaatkan waktu luang juga menjadi produktif serta bisa memilih barang-barang baru.
Adapun beberapa contoh kerajinan DIY barang recycle berikut ini sebagai inspirasi untuk pembuatan barang yang serupa:
1. Pembuatan Lampu Sendok Jika merasa bingung dengan banyaknya sendok plastik bekas yang tidak layak digunakan lagi pastikan untuk tidak membuangnya terlebih dahulu. Dalam hal ini dapat mengumpulkan beberapa sendok plastik bekas yang sudah tidak dipakai untuk digunakan dalam pembuatan lampu artsy. Dibandingkan mubazir dan tidak digunakan lagi tentunya bisa dengan membuat sendok plastik tersebut sebagai kerajinan dari barang bekas yang memiliki nilai seni tinggi. Terlebih untuk cara pembuatannya yang sangat mudah dengan tampilan yang unik dan menarik bisa menjadi ide kreasi yang mengagumkan.
2. Ide Roll Tisu Toilet Rol tisu toilet ternyata juga dijadikan sebagai pilihan bahan kerajinan yang memanfaatkan barang bekas. Dari segi pembuatannya sendiri bisa menghasilkan berbagai kreasi hanya dengan roll tisu toilet.
Seperti halnya dengan penggunaan roll tisu tersebut supaya bisa menjadi word art untuk nantinya dapat mempercantik bagian dinding ruangan ataupun untuk bungkus kado yang ukurannya mini. Selain itu juga bisa membuat kreasi tempat pensil hingga tempat penyimpanan gelang ataupun jam tangan yang terlihat sederhana namun tetap menarik.
3. Kreasi Vas dari Bohlam Pastikan dengan adanya lampu bohlam yang ada di rumah dan sudah tidak digunakan lagi sebaiknya tidak langsung membuangnya. Dalam hal ini bisa dengan mengubahnya untuk menjadi vas bunga yang terlihat sangat unik dan menarik.
Dibandingkan sekedar asal membuangnya secara sembarangan ketika sudah tidak menyala lagi. Tentunya bisa dengan memanfaatkan untuk dijadikan sebagai pajangan tambahan yang terlihat menarik di bagian kamar ataupun ruang tamu.
4. Recycle Botol DIY barang recycle menjadi pilihan ramah lingkungan supaya tidak terjadi penumpukan banyak. Dengan banyaknya kerajinan yang terbuat dari barang bekas seperti halnya bahan botol baik itu botol plastik ataupun botol kaca. Dalam hal ini bisa dengan membuat vas bunga dan diberikan tambahan lukisan untuk menghias botol. Selain itu juga dapat memanfaatkan botol plastik bekas untuk menghasilkan kreasi dompet koin.
5. Membuat Kaleng Sebagai Tempat Sendok Cara yang bisa digunakan dalam pembuatan kerajinan barang bekas dari kaleng memang menjadi pilihan yang sangat mudah untuk dilakukan. Pastinya bisa dengan menyulap kaleng bekas dari minuman ataupun makanan supaya nantinya bisa menjadi tempat sendok ataupun tempat pensil yang berguna.
Cara untuk melakukannya sangat mudah cukup dengan menghias kaleng yang disesuaikan selera supaya tampilannya terlihat unik dan menarik. Jika bingung mau dibuat bagaimana tentunya bisa langsung browsing terlebih dahulu di internet supaya bisa mendapat inspirasi untuk mengkreasikan barang bekas dari kaleng.
6. Daur Ulang Tutup Botol Jika selama ini terdapat banyak sekali kerajinan dengan memanfaatkan barang bekas yang menggunakan bagian botolnya saja. Akan tetapi ternyata juga banyak diantara orang-orang yang sudah memiliki ide kreasi dengan memanfaatkan tutup botol untuk dijadikan sebagai kerajinan tangan yang sangat unik.
Adanya tutup botol tersebut dapat dijadikan sebagai kreasi seni. Seperti halnya tutup botol yang dapat dimanfaatkan untuk pembuatan jam dinding, tong sampah ataupun hiasan cermin.
7. Daur Ulang Styrofoam untuk Membuat Papan Memo Jika sangat sering memanfaatkan styrofoam sebagai message board yang digunakan dalam pemajangan memo, foto ataupun beberapa kenangan lain tentunya tetap bisa membuat kreasi baru yang lebih keren lagi. Cukup dengan menggunakan kain bekas yang memiliki motif unik untuk dijadikan sebagai lapisan styrofoam.
Penerapan cara yang satu ini memang sangat praktis untuk dilakukan dalam mengaplikasikan styrofoam bekas ketika telah membeli barang elektronik. Sehingga tetap bisa digunakan sebagaimana mestinya supaya tidak menumpuk dan hanya menjadi pemandangan yang tidak enak untuk dilihat.
8. Membuat Keset dari Kaos Bekas Dibandingkan kaos-kaos bekas tersebut hanya menumpuk dan memenuhi bagian lemari. Tentunya ketersediaan kaos-kaos bekas tersebut yang sudah tidak digunakan bisa dijadikan sebagai bahan dalam pembuatan keset.
Akan tetapi jika masih banyak kaos yang layak digunakan sebaiknya disumbangkan bagi orang-orang yang membutuhkan terlebih dahulu. Pembuatan kreasi keset dengan memanfaatkan kaos bekas memang memiliki nilai guna dan nilai jual.
9. Daur Ulang CD Bekas CD lebih dianggap sudah tidak zaman untuk digunakan lagi di era saat ini karena sudah mengalami gempuran streaming yang lebih mudah dan praktis. Akan tetapi tidak perlu khawatir karena CD bekas yang dimiliki dengan kondisi rusak tentunya tetap bisa dilakukan daur ulang untuk dijadikan sebagai barang baru dan memiliki nilai fungsi baru.
Sekarang ini sudah banyak contoh kerajinan dengan memanfaatkan barang-barang bekas yang mana dari hasilnya bisa membuat banyak orang terkagum-kagum. Dalam hal ini bisa dengan memanfaatkan untuk menghias barang-barang lainnya seperti halnya gitar ataupun bisa dengan menyulap untuk dijadikan hiasan dinding yang memiliki nuansa futuristik.
10. Hiasan Lampu dari Kain Bekas Apabila masih memiliki banyak kain bekas juga dapat dimanfaatkan untuk menghias lampu yang masih tersedia di rumah. Lampu yang sudah lama tentunya akan terlihat seperti baru lagi dengan mengusung gaya yang tampak berbeda dari sebelumnya.
Selain itu bisa memberikan tambahan ornamen lain seperti halnya potongan CD bekas. Sehingga akan tetap memperlihatkan tampilan hiasan lampu unik.
Sampah Daur Ulang Jadi Produk Bermanfaat – Perkembangan cara pandang manusia mengenai banyak hal membuat banyak dari mereka melahirkan berbagai pemahaman baru. Kaitan yang menarik dalam pembahasan ini tidak hanya mengenai satu pilihan untuk menciptakan produk yang diinginkan, tetapi melibatkan begitu banyak hal yang melatarbelakanginya. Pilihan untuk daur ulang limbah bukan satu keadaan yang jadi begitu saja. Hal itu terjadi karena kenyataan menunjukan, bahwa bumi tidak dalam keadaan baik-baik saja. 80% sampah didominasi oleh plastik. Data lain menyebutkan, bahwa limbah dengan jenis tersebut akan sangat sulit terurai oleh tanah. Kondisi tersebut yang pada akhirnya memperburuk keadaan lingkungan. Ekosistem mulai terancam, sehingga impact yang paling terasa ialah perubahan iklim yang begitu ekstrim.
Bukan hanya daratan, plastik membuat biota laut tidak bertahan lama. Tingkat kebersihan air semakin rendah yang membuat manusia akan berada pada bahaya yang lebih besar, ketika tidak segera diminimlaisir. Indonesia bukan satu-satunya negara yang membicarakan masalah ini, tetapi terdapat berbagai negara yang menyuarakan hal yang sama. Negara-negara maju dengan pengetahuan dan kecanggihan teknologinya terus berupaya menciptakan fasilitas yang mampu daur ulang sampah secara praktis. Belanda juga termasuk negara yang begitu ketat akan kebersihan lingkungan. Tidak tanggung-tanggung, Belanda mempunyai anggaran besar untuk memastikan kondisi air disana tetap aman untuk dikonsumsi. Amerika Serikat juga memiliki alat sortir limbah dengan upah unik yang mereka berikan kepada masyarakat yang mengumpulkan sampah tersebut.
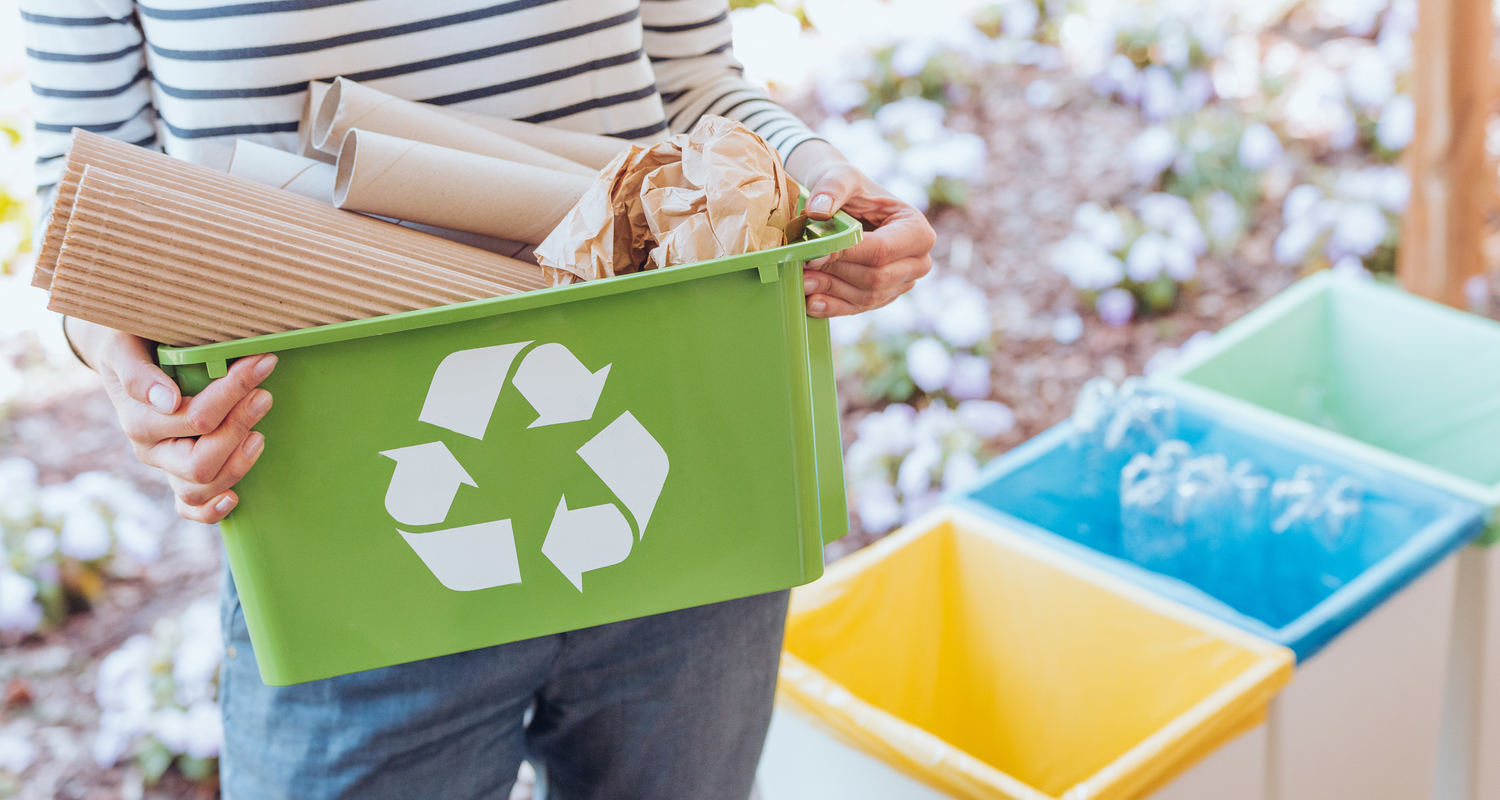
Selain itu, organisasi-organisasi pecinta alam hingga mereka yang memang peduli lingkungan juga melakukan banyak aksi untuk memastikan jumlah sampah yang tercipta mampu diperkecil. Langkah yang paling sering didengar tentu saja pengurangan penggunaan plastik, gerakan membersihkan sungai, hingga membuat daur ulang plastic dan jenis limbah lain menjadi produk dengan nilai guna tambah. Langkah tersebut menjadi aksi nyata yang bisa dilakukan. Sedangkan Anda yang belum bisa sampai pada tahap tersebut karena berbagai faktor. Cara termudah untuk memastikan minimal sampah ialah membedakan sampah organic dan non organic. Meskipun terbilang sepele, nyatanya tindakan tersebut akan mempermudah pekerjaan petugas untuk memastikan sampah-sampa yang dapat diolah kembali.
Sebenarnya pembahasan mengenai daur ulang sampah selalu saja menarik. Hal itu dikarenakan terdapat keterlibatan manusia secara langsung. Sikap tak acuh yang Anda lakukan selama ini akan membuat hidup semakin terasa panas. Untuk tidak berada pada kondisi yang lebih buruk, Anda dan manusia yang lain seharusnya mampu memastikan diri untuk lebih menjaga lingkungan. Bisa dipastikan bahwa hanya cara itu yang bisa menyelamatkan Anda dari ganasnya impact pemanasan global. Mulailah dengan hal-hal paling sederhana. Misalnya, menanam pohon hingga memastikan diri untuk tidak menggunakan plastik dalam jumlah besar.
1. Daur ulang sisa makanan Berbeda dari plastik yang sulit terurai oleh tanah, sisa makanan termasuk sampah yang memiliki masa terurai yang cukup cepat. Sayangnya, sampai saat ini ketika dibiarkan begitu saja akan mengeluarkan senyawa yang tidak baik untuk lingkungan. Misalnya saja, metana yang sudah pasti tak baik bagi kesehatan lingkungan. Nah, untuk mencegah hal itu terjadi secara berulang. Alangkah baiknya, ketika sisa makanan tersebut Anda olah menjadi pupuk organik. Langkahnya memang cukup rumit, tetapi percaya atau tidak, jika harga pupuk organic cukup mahal. Artinya, Anda akan mendapatkan keuntungan lebih dari langkah memanfaatan limbah tersebut.
2. Daur ulang kayu Selanjutnya, hal yang tidak kalah menarik yang juga bisa Anda manfaatkan menjadi kerajinan ialah daur ulang kayu. Furniture kayu yang sudah tidak terpakai karena kerusakan yang tidak terlalu parah bisa Anda jadikan produk lain yang lebih bernilai. Beberapa pengrajin telah membuktikan ide daur ulang yang satu ini, sehingga Anda tak perlu khawatir dengan banyaknya potensi yang tercipta.
Menariknya lagi, kerajinan tangan biasanya akan mempunyai penawaran harga yang lebih tinggi. hal ini tentu menjadi aspek penyemangat bagi Anda untuk tidak membuang limbah kayu begitu saja.
3. Daur ulang tekstil Berikutnya, limbah yang juga banyak berserakan adalah limpah tekstil. Limbah tersebut sudah pasti akan menumpuk, sebab konsumsi pakaian terus berlanjut. Bayangkan seberapa banyak limpah yang akan dihasilkan, ketika sampah tekstil tersebut tidak dimanfaatkan dengan baik? Menyenangkannya sekarang, usaha barang thrift shop semakin banyak digemari. Bisnis itu termasuk penjualan baju bekas yang masih sangat layak. Diberbagai negara telah bermunculan bisnis terjadi. Bahkan kualitas produk yang dijual tidak kaleng-kaleng.
Langkah cukup menjanjikan ini bukan sekedar ladang penghasilan. Melainkan menjadi cara menyenangkan untuk mengurangi limbah tekstil yang betebaran. Sedangkan pakaian yang sudah tak layak jual ataupun kain percaya, Anda bisa dijadikan kreasi lain untuk menghasilkan produk baru yang siap jual. Sudah banyak contoh yang bisa Anda temukan, sehingga pengrajin bisa langsung belajar untuk memanfaatkan limbah tekstil di sekitar tempat tinggal.
4. Daur ulang ban Sampah yang juga berat untuk diatas ialah limbah ban. Meskipun awalnya akan sukar membuat kerajinan dari ban, tetapi seiring peningkatan kreativitas yang muncul. Banyak orang yang memanfaatkan ban sebagai media tanam. Selain itu, ban seringkali dikreasikan menjadi kursi, hiasan, hingga mainan anak. Bentukan ban yang khas dengan tekstur unik malah menjadikannya produk baru yang menarik.
5. Daur ulang kaleng Setelah itu, daur ulang kaleng. Sama seperti sampah plastik dan ban yang sangat sulit terurai, kaleng juga termasuk limpah yang sangat bandel untuk terurai. Nah, recyle yang biasanya dilakukan adalah membuat produk estetik dari kaleng.
Ide Produk Daur Ulang Limbah yang Menjanjikan – Belakangan ini, permasalahan iklim serta kerusakkan alam menjadi pembahasan yang semakin sering dibicarakan. Isi sensitive ini tidak hanya terjadi di Indonesia, melainkan hampir semua negara di dunia juga mengalami permasalahan global yang serupa terkait perubahan iklim ekstrim. Berbagai penelitian juga bermunculan untuk mendeskripsikan keadaan yang terjadi. Bumi semakin panas dengan keadaan ozon yang kian menipis karena berbagai penyebab yang diakibatkan dari ulah manusia.
Kesadaran mengenai perbaikan lingkungan mulai dipahami dan semakin banyak masyarakat yang menyuarakan untuk peduli lingkungan, termasuk menggerakan net zero emission. Langkah tersebut dianggap paling tepat untuk menyelamatkan bumi dari kerusakkan. Manusia tentu mempunyai peran penting yang poin utama akan langsung dirasakan dalam kehidupan sehari-hari.
Salah satu cara paling sering dilakukan untuk mendukung gerakan tersebut ialah daur ulang. Kegiatan recyle limbah menjadi cara menyenangkan karena dari proses ini akan muncul produk baru yang memiliki guna lebih panjang. Apabila langkah tersebut terus dilakukan, maka penggunaan limbah yang sulit terurai akan lebih kecil. Meskipun untuk sampai pada sikap ini sangat sulit, tetapi tidak ada salahnya untuk mencoba hal-hal paling ringan terlebih dahulu. Misalnya saja, memilah memilih limbah kering dan basah. Dari sini, Anda akan mempermudah proses pendaurulangan produk. Jika melihat di negara-negara maju. Mereka bahkan memiliki semacam fasilitas umum yang digunakan untuk menukar sampah plastic.
Anda tinggal memasukkan limbah plastic ke sebuah mesin besar. Kemudian terhitung berapa uang yang Anda peroleh dari proses tersebut. Cara ini tentu akan menyenangkan, sebab selain peduli akan kebersihan lingkungan sekitar. Masyarakat juga akan bersenang hati memunggut sampah plastic untuk mendapatkan tambahan uang jajan. Sedangkan di Indonesia, mesin seperti itu belum tersedia. Tetapi langkah untuk melakukan daur ulang sudah banyak digerakan oleh produsen kerajinan tangan rumah. Produk yang dihasilkan tak kalah menarik, sehingga pantas jika ide daur ulang ini cukup menjanjikan untuk dijadikan ladang usaha baru. Syarat yang sebenarnya diperlukan untuk memulai proses ini hanyalah tekat yang kuat.
Mengapa seperti itu? Pasalnya, tidak semua proses daur ulang bisa dilakukan dengan mudah. Tingkat telaten yang dimiliki mungkin jauh lebih tinggi, sebab Anda akan bersentuhan langsung dengan limbah. Kondisi limbah yang tidak sesuai mungkin akan mempengaruhi hasil akhir dari produk tersebut. Hal-hal diluar kendali ini yang biasanya membuat produsen harus lebih bersabar karena tahapannya yang lebih kompleks. Lakukan saja semuanya dengan gerakan paling sederhana. Anggap langkah ini menjadi bagian paling menyenangkan untuk menyelamatkan bumi. Gerakan yang sama juga sering ditampilkan oleh negara-negara maju seperti Belanda hingga Amerika Serikat. Untuk melihat ide daur ulang ini dari dekat, berikut konsep yang mungkin bisa Anda lakukan:
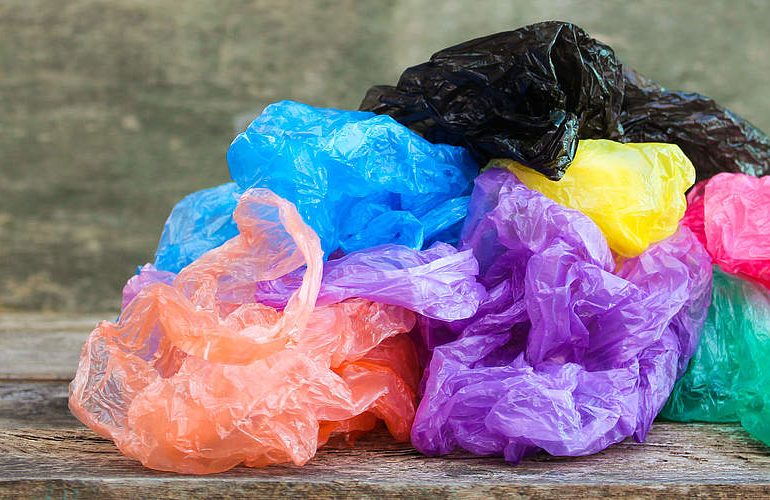
1. Daur ulang plastik Pertama, Anda bisa memulai dari mendaur ulang plastik. Dari data yang tersebar bisa ditarik kesimpulan, bahwa plastik menjadi penyumbang sampah terbesar di dunia. Tercarat lebih dari 80% lautan sampah plastik. Penyebaran sampah ini semakin kacau, sebab terkadang seseorang membuang sampah tersebut ke laut. Efek yang ditimbulkan tentu akan sangat berbahaya. Bukan hanya tentang merusak lingkungan air, tetapi terdapat impact lebih kuat terkait pencemaran tersebut.
Langkah untuk daur ulang plastik tentu menjadi dasar paling sempurna bagi Anda yang ingin mulai mengurangi pencemaran lingkungan. Untuk ide produk yang bisa dibuat dari sampah tersebut ialah tas belanja, pot tanaman, bunga hiasan, hingga wadah aksesoris lain. Jika dikerjakan dengan teliti, produsen pasti akan menghasilkan produk daur ulang yang bagus dengan harga jual yang cukup tinggi. Anda bayangkan, seberapa besar keuntungan yang diterima dari limpah tersebut.
2. Daur ulang kertas Selanjutnya, daur ulang kertas juga menjadi bagian dari ide recyle yang banyak dilakukan oleh beberapa pengrajin. Sebenarnya, limbah kertas ini tidak seberbahaya plastik, namun dalam jumlah yang tidak terkontrol sampah plastic tetap saja membuat lingkungan terlihat kumuh dan kotor. Berhubung sampah kertas terdiri dari berbagai kategori, mereka akan melakukan penyotiran terlebih dahulu.
Proses tersebut dilakukan untuk mempermudah pengolahan kertas menjadi baru. Setelah melalui berbagai tahapan, kertas akan diputihkan. Lalu, berubah menjadi kertas baru yang siap digunakan kembali. Meskipun kertas termasuk limbah terurai, tetapi karena bahan utama pembuatan kertas dari pohon. Ketika pendaurulangan tak dilakukan. Maka, dampak negatifnya akan terjadi pada keadaan lingkungan. Salah satu yang sering terjadi ialah penebangan pohon secara liar. Kenyataan ini sudah seharusnya diminimalisir, sebab diakui atau tidak alur kehidupan saling terikat. Jadi, apabila terdapat salah satu komponennya yang rusak akan berdampak pada aspek lain.
3. Daur ulang kardus dan karton Berikutnya, daur ulang bisa dilakukan pada kardus dan karton. Jika diperhatikan keduanya memiliki karakteristik yang sama dengan kertas. Basic pembuatannya juga sama, namun menjadi lebih menarik karena kardus dan karton memiliki ukuran tebal yang berbeda. Hal ini mempermudah proses pendaurulangan untuk dijadikan berbagai produk baru yang bermanfaat. Mulai dari kotak tisu, pigura foto, lampu gantung, hingga celengan unik dari kardus.
4. Daur ulang kaca Terakhir, recyle juga bisa Anda lakukan pada bahan-bahan yang terbuat dari kaca. Komponen yang satu ini sering terlihat tergeletak begitu saja, namun ditangan beberapa pengrajin. Kaca bekas bisa diubah menjadi produk bernilai tinggi. Pertama, kaca akan dipotong dengan ukuran kecil. Setelah disortir dan dibersihkan, kaca akan dilah dengan penambahan komponen lain.
Kerajinan Tangan dari Daur Ulang Limbah– Daur ulang limbah menjadi solusi alternative yang paling menarik untuk mengatasi permasalahan sampah yang terus menumpuk. Konteks tersebut terus dibicarakan dan diproses oleh para pengrajin dengan skill yang dimiliki. Pembahasan ini tidak sekedar tentang ide bisnis dengan perhitungan untung lebih besar. Tetapi terdapat pertimbangan lain sebagai langkah kecil yang seharusnya sudah bisa dilakukan oleh semua orang untuk memperkecil impact dari pencemaran lingkungan yang disebabkan oleh sampah. Bagaimanapun semua negara gencar membahas mengenai hal ini. Kaitan yang dimunculkan akan lebih banyak karena pada akhirnya, sampah tidak hanya merusak lingkungan. Tetapi berdampak pada pencemaran air hingga udara.
Fakta menyebutkan, bahwa 80% sampah plastik terus mengalami peningkatan. Sedangkan secara bersamaan, plastik termasuk limbah yang tidak bisa terurai oleh tanah dengan mudah. Bahkan dikubur dan dibakar bukan solusi yang tepat untuk mengatasi pengurangan sampah plastik. Hal itu hanya akan membuat perubahan pencemaran secara terus-menerus. Kenyataan yang sekarang bisa dirasakan ialah perubahan iklim yang sangat ekstrim. Dampak yang lebih parah akan semakin terasa, ketika kondisi ini tidak segera diatasi. Setidaknya, pemahaman itu yang membuat setiap individu tergerak untuk memperbaiki konsumsi limbah plastik dan jenis sampah lain. Langkah paling sederhana yang dapat dilakukan adalah melakukan pemilahan sampah secara konsisten. Cara tersebut akan sangat membantu proses penyotiran sampah secara global.
Dari banyaknya cara yang sudah dibuat oleh berbagai negara untuk mengatasi persoalan sampah, mungkin Indonesia masih berada pada tingkat melakukan minimalisir sampah dengan menghemat penggunaan plastik. Walaupun gerakan itu masih sangat sulit dilakukan, tetapi setidaknya langkah melakukan perbaikan telah dilakukan. Selain itu, proses daur ulang limbah plastik juga berhasil memunculkan peluang dengan perhitungan untung yang lebih tinggi. Konteks ini yang akhirnya, membuat para pengrajin memiliki alasan pasti untuk tetap berkarya menghasilkan produk bernilai dari limbah. Selain plastik, limbah tekstil juga menarik untuk dimanfaatkan secara menyeluruh. Kebanyakan pengrajin DIY membuatnya sebagai bentukan tas. Tampilan yang khas menjadikan tas ini terlihat lebih menarik.
Poin lain yang tak kalah menarik, kerajinan tangan biasanya dihargai dengan nominal yang cukup tinggi. Berikutnya, Anda juga bisa mencoba keseruan membuat kerajinan dari kaca bekas. Proses penyortiran kaca akan dilakukan secara cermat. Setelah itu, tahap berikutnya akan membuat kaca dengan bentukan yang baru kembali. Jika dicermati lebih detail, langkah recyle termasuk cara terbaik bagi manusia untuk memanfaatkan berbagai jenis sampah. Setidaknya, upaya untuk melindungi lingkungan akan berpengaruh pada meningkatnya pendapatkan yang Anda peroleh. Data lain menyebutkan, bahwa ide kerajinan tangan dari limbah memiliki peluang cukup tinggi, sebab produk yang dihasilkan akan lebih menarik. Contohnya, limbah sisa makanan yang dapat diubah menjadi pupuk organic.
Bagi Anda yang masih penasaran dengan ide daur ulang sampah. Berikut pilihan yang mungkin dapat Anda maksimalkan:
1. Recyle plastik Pertama, Anda dapat melakukan daur ulang plastik. Ketentuan daur ulang ini tidak memperlukan waktu lama, sebab biasanya penggunaan plastik untuk dibuat menjadi kerajinan cukup mudah. Bahkan Anda tinggal memastikan jenis plastic yang diperlukan. Sedangkan untuk hasil yang lebih maksimal, mungkin Anda perlu berbagai peralatan memadai untuk memastikan hasil dari daur ulang itu sesuai dengan keinginan.
Mengingat bahayanya limbah plastic untuk lingkungan, Anda yang memiliki ketertarikan dengan kerajinan tersebut seharusnya lebih fokus untuk menggunakannya. Caranya sangat sederhana, sebab jumlah sampah jenis ini sangatlah banyak. Artinya, kepedulian masyarakat terkait penangganan limbah plastic seharusnya lebih tinggi. Mengingat limbah tersebut akan sulit terurai di tanah. Plastik yang betebaran di sungai akan mencemari kebersihan air dan merusak biota laut.
2. Recyle sisa makanan Seperti yang telah dijelaskan sebelumnya, bahwa detail dari proses daur ulang juga bisa Anda lakukan pada sisa makanan. Sebenarnya, sisa makanan bukan sampah yang tidak bisa terurai oleh tanah. Namun, tumpukan sisa makanan tetap saja akan mengeluarkan emisi yang tidak baik untuk lingkungan. Jadi, bagi Anda yang mempunyai sisa makanan sebaiknya dijadikan pupuk organic.
Proses pembuatannya terbilang mudah, namun Anda harus sabar karena tahapan pembuatan pupuk ini memperlukan waktu yang cukup lama. Cara mudah untuk memanfaatkan sampah sisa makanan ini dengan menjadikannya sebagai pakan hewan meliharaan. Mulai dari pakan lele, ayam, hingga hewan ternak lain.
3. Recyle kaca Ide kerajinan yang berasal dari limbah yang berikutnya bisa dimulai dari bahan utama sampah kaca. Proses yang diperlukan untuk mengolah kaca menjadi produk baru tentu bukan hal yang mudah, sehingga ide ini biasanya diambil oleh produsen yang memang telah professional dibidangnya. Sedangkan untuk beberapa orang biasanya akan memanfaatkan pecahan kaca sebagai detail figura foto. Detail tersebut kemungkinan akan lebih menarik, sebab terdapat ornament tambahan yang menjadikannya semakin indah serta estetik.
4. Recyle kertas Setelah itu, sampah yang juga mempunyai jumlah bertumpuk adalah kertas. Tidak seperti plastic yang sulit untuk terurai, kertas sebenarnya dapat terurai tanah dengan cepat. Namun, konsumsi kertas dalam jumlah besar secara terus-menerus tetap saja akan berdampak buruk untuk lingkungan. Hal tersebut dikarenakan bahan utama pembuatan kertas adalah pohon. Semakin tinggi kebutuhan kertas, maka semakin banyak pohon yang diperlukan. Untuk menghindari hal itu daur ulang kertas dilakukan. Prosesnya juga cepat, sebab mesin mencetak kertas daur ulang membuat tahapannya kian mudah. Setelah melewati beberapa tahap, limbah kertas akan menjadi kertas baru lagi.
Panduan Melakukan Recycle Sampah agar Memiliki Nilai Guna – Dalam melakukan recycle terhadap sampah harus memilah barang yang bisa dimanfaatkan kembali fungsinya. Di negara Indonesia dan negara luar tentunya mempunyai teknologi yang berbeda dalam melakukan proses daur ulang terhadap sampah yang ada di lingkungan sekitar.
Dengan begitu, melakukan proses daur ulang ini tentunya tidak hanya dilakukan di satu tempat saja. Daur ulang perlu dilakukan di beberapa tempat supaya bisa menjaga konsistensi untuk mengenakan tingkat jumlah pembuangan sampah.
Banyak sekali benda-benda yang dianggap tidak memiliki nilai guna ternyata masih bisa dimanfaatkan kembali baik itu dengan fungsi utama ataupun dialihkan fungsinya. Sehingga dengan dilakukan daur ulang bisa mengurangi pembuangan sampah yang membuatnya semakin menumpuk seperti gunungan yang tidak ada habisnya.
Produk Hasil dari Recycle Sampah
1. Plastik Dari semua jenis plastik sebenarnya tetap bisa dimanfaatkan dengan fungsi yang berbeda. Cara untuk melakukan pengelolaan terhadap daur ulang sampah ini harus melalui tahap pembersihan, pembilasan dan diproses sesuai dengan keinginan.
Plastik dapat diproses untuk dijadikan pelet plastik berkualitas yang cenderung lebih rendah atau menjadi produk daur ulang lainnya. Produk untuk daur ulang plastik yang kualitasnya lebih rendah meliputi tempat sampah daur ulang, ventilasi, karton telur, isolasi, kemasan busa, karpet, furniture, penanda jalan, lantai, panel, alat pembersih dan lainnya.
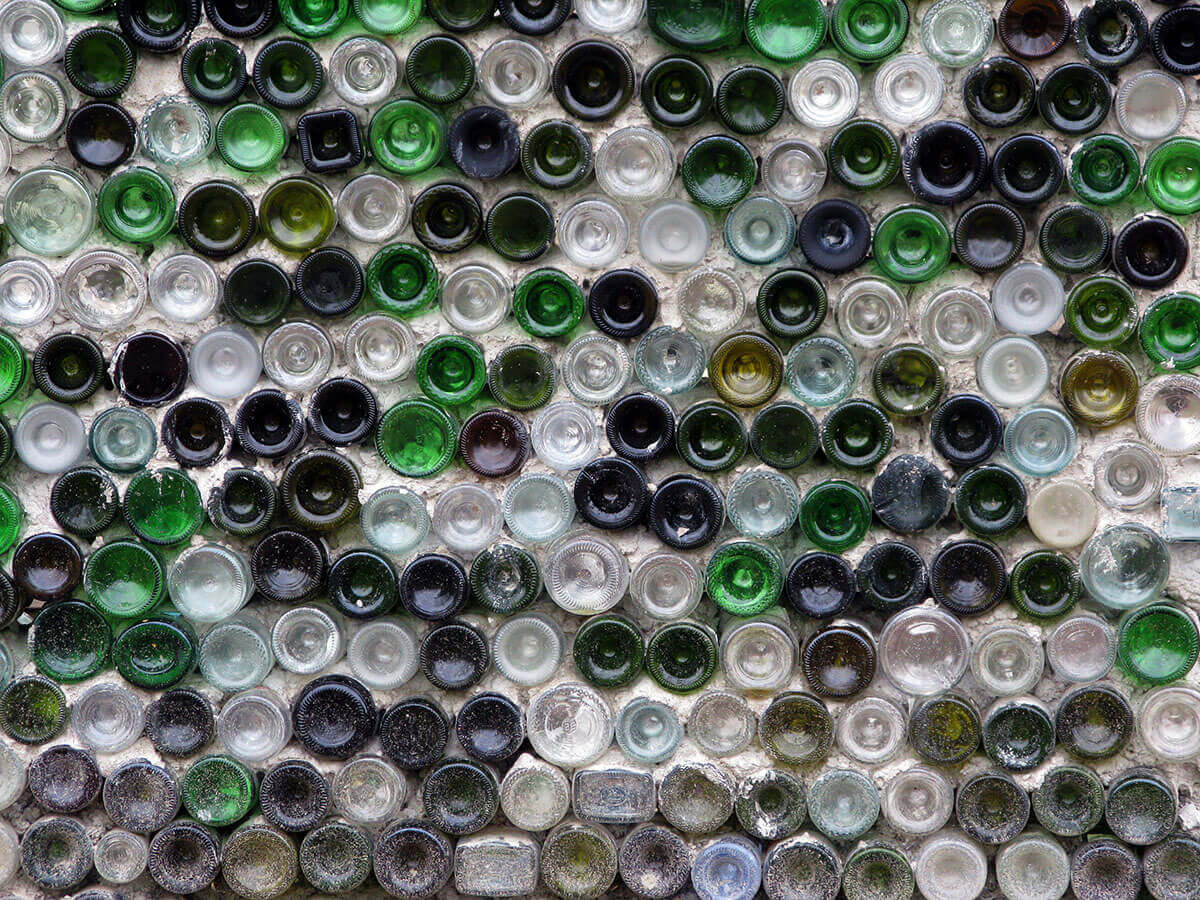
2. Kaca Bahan kaca ini tidak seperti jenis bahan plastik ataupun kertas. Hal ini dikarenakan, kaca merupakan salah satu bahan yang bisa sewaktu-waktu mengalami penurunan dari kualitas minimumnya apabila telah dilakukan proses daur ulang.
Dari faktor inilah yang menjadikan penggunaan bahan kaca lebih disarankan supaya tidak dibuang apabila memang tertarik dalam membantu untuk menekan peningkatan jumlah sampah yang terus berkumpul di TPA. Adapun untuk beberapa jenis bahan kaca yang bisa dilakukan daur ulang meliputi;
• Bingkai foto • Gesekan yang mendukung pertandingan dan amunisi • Bahan pada beton • Bahan untuk cat reflektif jalan • Lantai keramik • Botol kaca lain, botol, wadah • Fiberglass • Pasir di pantai yang telah tersapu erosi secara terus menerus • Dimanfaatkan untuk abrasif pada proses peledakan pasir
3. Logam DIY bahan-bahan recycle bisa memanfaatkan logam untuk proses daur ulang yang dilakukan secara berulang kali tanpa harus melakukan pengubahan terhadap kualitasnya. Baja merupakan material yang lebih mudah untuk didaur ulang oleh masyarakat.
Daur ulang terhadap logam juga termasuk aluminium, perak, tembaga, emas, dan kuningan. Terdapat dua jenis metal yaitu ferrous dan non ferrous.
Pada jenis logam ferrous merupakan bahan yang telah dikombinasikan antara karbon dengan besi. Beberapa bahan untuk jenis logam ini pada umumnya sudah termasuk baja paduan, baja karbon, besi cor dan besi tempa.
Selain itu, ada logam non ferrous meliputi timah, tembaga, seng, dan aluminium. Logam mulia merupakan non ferrous yang meliputi platinum, emas, iridium, perak dan palladium.
4. Kertas Kertas juga bisa dimanfaatkan untuk daur ulang guna mengalihkan fungsinya yang lebih berguna lagi. Namun, perlu dipahami untuk melakukan daur ulang terhadap kertas hanya dapat dilakukan beberapa kali saja jika memang kondisinya masih layak untuk digunakan.
Syarat yang dimiliki oleh kertas semakin pendek apabila sudah melalui tahapan proses daur ulang secara terus-menerus. Selain itu, kondisi kertas lebih mudah terkontaminasi dengan sisa makanan, minyak ataupun beberapa bahan lain yang menimbulkan kerusakan pada kertas.
Dengan alasan tersebut untuk proses daur ulang terhadap produk kertas yang dihasilkan juga bisa mengalami penurunan dari segi kualitasnya. Sejumlah kertas yang cukup sulit untuk dilakukan daur ulang seperti kertas basah, tisu, pizza yang sudah kotor karena saus dan minyak serta kertas faks.
Produk yang bisa dihasilkan dengan memanfaatkan daur ulang dari kertas diantaranya kartu ucapan, kertas kantor, kertas toilet dan tisu, majalah dan koran, karton serta handuk dan serbet kertas. Dengan memanfaatkan bahan-bahan yang ada di lingkungan sekitar tentunya bisa melakukan daur ulang untuk mengalihkan fungsi dari bahan kertas itu sendiri.
5. Sampah Organik Sebagian besar limbah yang menumpuk di TPA yaitu berasal dari sampah organik. Adanya banyak sampah organik yang menumpuk sebenarnya tetap bisa terdegradasi di alam, namun tetap membutuhkan perlakuan secara khusus untuk menghancurkan sampah organik supaya lebih terurai dengan cepat.
Hal ini tentunya juga memberikan dampak negatif bagi lingkungan sekitar jika sampah organik tidak dilakukan pengelolaan dengan benar. Sampah organik yang telah terbuang pasti akan tercampur dengan banyaknya sampah non-organik dan justru hanya terjebak ditumbuhkan sampah di TPA.
Penumpukan sampah yang tidak terurai di TPA justru bisa menghasilkan gas metana yang menjadikannya lebih mudah terbakar dan bahkan bisa menciptakan ledakan yang sangat berbahaya di lingkungan sekitar. Timbulnya gas metana ini adalah jenis dari gas rumah kaca yang bisa menimbulkan kerusakan untuk lapisan ozon apabila langsung dilepaskan ke lingkungan.
Terdapat beberapa metode yang bisa digunakan dalam memproses sampah pada organik yang telah menumpuk seperti vermicomposing, pengomposan dan lubang biopori. Beberapa produk dari hasil daur ulang sampah organik diantaranya biogas, kompos dan pakan ternak.
6. Sampah Elektronik Sampah elektronik merupakan komponen yang berbahaya dan menimbulkan racun apabila dibuang secara sembarangan. Kebocoran yang terjadi pada komponen berbahaya untuk sampah elektronik ini bisa mencemari lingkungan sekitar baik itu air ataupun tanah.
Sehingga ketika membuang sampah elektronik sebaiknya tidak dilakukan sembarangan dan mengikuti prosedur tertentu. Simpan terlebih dahulu sampai elektronik di tempat yang aman sebelum nantinya dilakukan distribusi pada agen daur ulang ataupun agen penjualan supaya dapat diproses secara maksimal.
Adapun untuk produk yang bisa dilakukan daur ulang sebenarnya sangat banyak dan dapat menggantikan fungsi utamanya. Proses daur ulang memiliki banyak manfaat supaya tidak menumpuk di TPA.
Inspirasi Recycle Pada Barang Bekas Menjadi Benda Bermanfaat – Terdapat banyak cara yang bisa dilakukan supaya bisa mengurangi jumlah peningkatan sampah setiap harinya. Cara tersebut dengan melakukan daur ulang terhadap beberapa sampah untuk mengalihkan fungsinya supaya tetap bisa bermanfaat kembali.
Saat ini untuk kampanye dalam mencintai lingkungan sekitar telah digalakkan di seluruh dunia sehingga dengan proses daur ulang terhadap sampah bisa menjadi kontribusi paling nyata yang dapat dilakukan dengan mudah. Daur ulang ini bisa disiapkan dengan memanfaatkan beberapa barang bekas supaya bisa disulap untuk menjadi barang yang lebih berguna.
Biasanya barang-barang bekas yang digunakan yaitu jenis barang yang sulit terurai secara alami bersama tumbuhan sampah lainnya. Sehingga jangan dilakukan daur ulang bisa membuat penumpukan sampah lebih berkurang dan bisa mengembalikan fungsi dari barang itu sendiri.
Barang Bekas yang Bisa Disulap Lebih Bermanfaat
1. Botol Minuman Plastik Adanya botol minuman plastik ini merupakan sampah yang sangat sulit untuk terurai secara alami. Sehingga bisa dilakukan proses daur ulang untuk membuatnya sebagai kerajinan yang nantinya bisa memiliki nilai jual lebih tinggi.
Pada dunia industri untuk proses daur ulang botol plastik bekas bisa dengan menghancurkan serta menggiring botol yang sudah tidak digunakan tersebut. Setelah itu, botol bekas bisa difungsikan dengan membentuknya seperti pot bunga, bunga plastik dan celengan.
2. Kain Perca yang Tidak Digunakan DIY benda-benda recycle apabila kebetulan memang memiliki kain perca yang tersisa dan menumpuk di rumah sebanyak tidak hanya dibiarkan untuk menjadi sampah saja. Banyaknya tumpukan kain bekas tersebut bisa diubah menjadi kerajinan yang lebih bermanfaat dan memiliki nilai jual tinggi.
Hasil produk dari pembuatan kain perca ini berupa keset ataupun taplak meja yang bisa digunakan secara maksimal. Adanya kain bekas yang tidak digunakan biasanya diperoleh dari tempat jahit atau pengusaha konveksi, sehingga bisa diambil dan tidak langsung membuangnya yang justru menimbulkan dampak negatif terhadap lingkungan.
3. Ban Bekas Ban bekas merupakan sampah yang saat ini memang sudah jarang ditemukan menumpuk di gunungan TPA. Akan tetapi, ban bekas ini memiliki nilai yang lebih tinggi di pasaran.
Adanya sampah ban bekas bisa dilakukan pengolahan untuk dijadikan kursi ataupun meja estetik yang diberikan sentuhan warna dan cat. Apabila memang tidak ingin repot dalam melakukan pengolahan barang bekas, tentunya bisa menjual langsung ke industri yang melakukan produksi ban karena biasanya akan membutuhkan bahan baku yang lebih banyak untuk pembuatan ban baru.
4. Kaleng Bekas Kaleng bekas makanan ataupun minuman sebanyak tidak langsung dibuang ke tempat sampah karena bisa dilakukan pengolahan kembali. Proses untuk memanfaatkan daur ulang terhadap kaleng bekas ini bisa mempunyai nilai guna yang berbeda dari fungsi utamanya.
Akan tetapi, dalam pengolahan daur ulang tentunya juga dibutuhkan kreativitas serta ketelitian yang lebih tinggi untuk melakukan recycle sampah tersebut. Hal ini dikarenakan, tidak semua orang memiliki kemampuan dengan kehadiran kreativitas yang dihasilkannya.
Jika memang menjadi orang yang kreatif tentunya tidak perlu ragu lagi dalam merubah kaleng bekas supaya bisa menghasilkan barang yang memiliki nilai guna. Hadirnya produk kerajinan yang berasal dari kaleng bekas memiliki banyak manfaat jika sudah dialihkan fungsinya.
5. Kertas Bekas Kertas bekas masuk dalam kategori sampah yang tidak dapat diuraikan kembali secara alami dan bahkan jumlahnya terus menumpuk setiap harinya. Meskipun dalam penggunaan sampah kertas bekas ini sudah dikurangi namun juga tidak bisa menurunkan jumlah pembuangan untuk jenis kertas bekas ini.
Manfaat Pengolahan Barang Bekas
1. Melatih Kreativitas Memanfaatkan waktu luang untuk pengolahan barang bekas tentunya bisa melatih peningkatan kreativitas dari setiap orang. Dalam hal ini bisa dimulai dengan memanfaatkan beberapa barang bekas yang ada di lingkungan sekitar saja.
Bagi para pemula tentunya untuk memulai memanfaatkan barang-barang bekas tidak terlalu sulit karena bisa menggunakan botol plastik, kertas ataupun karton terlebih dahulu. Cara pembuatannya juga bisa melihat tutorial pemanfaatan beberapa barang bekas melalui YouTube ataupun website yang bisa mendukung peningkatan kreativitas dari setiap orang.
2. Mengurangi Timbunan Sampah Dalam memanfaatkan sampah melalui proses daur ulang supaya bisa dijadikan sebagai barang lain yang lebih bermanfaat memang menjadi hal yang perlu dilakukan saat ini. Pada proses daur ulang ini bisa membantu dalam mengurangi timbunan sampah yang ada di TPA supaya tidak semakin menumpuk setiap harinya.
Meskipun hal ini merupakan tindakan yang kecil, namun pastikan tidak menyepelekan atas kontribusi yang diberikan untuk menjaga keselamatan bumi. Semua hal yang dilakukan memang harus dicoba mulai dari hal kecil termasuk dalam mengurangi timbunan sampah yang bisa menyebabkan kerusakan lingkungan sekitar.
3. Sumber Penghasilan Tambahan Apabila memiliki kreativitas yang tinggi dalam pengolahan daur ulang barang-barang bekas tentunya bisa dimanfaatkan secara maksimal. Terlebih bagi beberapa orang yang memiliki kreativitas untuk menghasilkan produk baru dari bahan-bahan bekas tentunya hal ini menjadi kegiatan yang sangat mudah untuk dilakukan sehari-hari.
Bahan-bahan bekas bisa difungsikan menggunakan kreativitas untuk diubah ke fungsi lain yang lebih bermanfaat bagi orang banyak. Jika kegiatan ini ditekuni secara terus-menerus tentunya bisa menjadi peluang bisnis untuk mendapatkan penghasilan tambahan.
Banyak sekali sampah daur ulang yang justru mempunyai nilai lebih tinggi pada saat dijual di pasaran. Modal dalam membuka peluang bisnis ini tentunya kemampuan untuk meningkatkan kreativitas supaya menghasilkan produk baru yang memiliki nilai jual lebih tinggi di pasaran.
Itulah beberapa barang bekas yang bisa didaur ulang kembali dan memiliki banyak manfaat bagi orang lain. Proses daur ulang dengan melakukan pengubahan atau fungsi utama dari barang bekas supaya memiliki manfaat baru.